

Table of Contents
- What You’ll Need Before Packing Inventory Boxes
- Step 1: Declutter and Sort Your Items Before Packing
- Step 2: Create a Detailed Inventory List for Your Boxes
- Step 3: Master Labelling Moving Boxes for Easy Access
- Step 4: Pack Fragile Items for Storage Safely
- Step 5: Distribute Weight and Avoid Overstuffing Boxes
- Step 6: Organise Storage Boxes in Your Unit
- Common Mistakes to Avoid When Packing Inventory Boxes
How to Pack Inventory Boxes: A Step-by-Step Guide
Last Updated: July 27, 2026
Learning how to pack inventory boxes properly can mean the difference between damaged goods and a smooth storage experience. Whether you’re preparing items for a move, storing business inventory, or organising household belongings, the process requires strategy, not just stuffing items into boxes. At Urban Self Storage, we’ve helped thousands of customers protect their belongings through proper packing techniques. Below, we’ll show you exactly how to pack inventory boxes using proven methods that save time, protect your items, and make retrieval effortless.
What You’ll Need Before Packing Inventory Boxes
Gathering the right packing materials before you start is essential. Assess how many boxes you’ll need, then purchase 10-15% extra to account for items that don’t fit neatly.
Essential materials include sturdy moving boxes in multiple sizes, quality packing tape, bubble wrap for fragile items, kraft paper for padding, and a permanent marker for labelling. You’ll also need scissors or a box cutter. For storage specifically, plastic moving containers offer better protection than cardboard against moisture and pests, though they cost more upfront. Urban Self Storage‘s climate-controlled facilities with 24/7 CCTV surveillance keep cardboard boxes safe for extended periods.
Choose box sizes based on contents: small boxes (1.5 cubic feet) for heavy items like books, medium boxes (3 cubic feet) for most household goods, and large boxes (4.5 cubic feet) for lightweight items like pillows and blankets. Never put heavy items in large boxes, they become too heavy to lift safely and risk collapsing during stacking. Specialty boxes like wardrobe boxes for clothes, dish pack boxes for plates, and bottle boxes for glassware are worth the investment for long-term storage.
Step 1: Declutter and Sort Your Items Before Packing
Before packing, declutter ruthlessly. Sort items into four categories: keep, donate, sell, and discard. Be honest about what you actually use. This process typically reduces storage needs by 20-30%.
After decluttering, sort remaining items by category, not by room. Group all kitchen items together, all office supplies together, all seasonal decorations together. This makes packing more efficient and retrieval far easier.
| Category | Action | Benefit |
|---|---|---|
| Items not used in 2+ years | Donate or sell | Reduces storage volume by 20-30% |
| Broken or damaged items | Discard | Prevents wasting box space |
| Seasonal items | Group together | Easy seasonal access |
| Frequently needed items | Pack last | Stored near unit entrance |
Step 2: Create a Detailed Inventory List for Your Boxes
Creating a detailed inventory list is the difference between knowing what you’ve stored and searching blindly through boxes. Number each box sequentially with a permanent marker on the top and at least one side. Create a spreadsheet recording: box number, contents list, weight, and storage location within your unit. Be specific, "dinner plates (12), mixing bowls (4), baking pans (6)" is actionable; "kitchen items" is not.
Digital inventory management tools like Google Sheets or Sortly make this process faster and more reliable. For business inventory, digital tracking is essential to know stock levels without visiting your unit. Using QR codes for box tracking adds sophistication: print QR codes for each box, attach them to the exterior, and link each code to your inventory spreadsheet. Scanning a QR code displays that box’s contents instantly, reducing retrieval time by 50% compared to manual searching.
Create a backup of your inventory list. Store one copy in your phone, one in the cloud, and one printed at home.
Step 3: Master Labelling Moving Boxes for Easy Access
Label boxes clearly on at least two sides so you can read the label regardless of how the box is stacked. Include the box number, contents category, and a brief item list. Use large, clear handwriting.
Colour-coding systems transform box organisation from chaotic to systematic. Assign a colour to each category: red for kitchen items, blue for bedroom items, green for office supplies, yellow for seasonal decorations. Use coloured tape or markers to mark each box. This system works exceptionally well when multiple people access your storage unit.
Combine colour-coding with room labels. If storing items from multiple rooms, add the room name: "Kitchen, Red Box 3" or "Office, Blue Box 7." This makes unpacking far more efficient.
Step 4: Pack Fragile Items for Storage Safely
Packing fragile items safely requires multiple layers of protection. Start with 2-3 inches of bubble wrap, packing peanuts, or crumpled kraft paper at the box bottom to cushion the base.
Wrap each fragile item individually. Plates need at least two layers of bubble wrap, secured with tape. Glassware should be wrapped individually, then grouped with additional padding between pieces. Artwork and mirrors need bubble wrap on all sides in specialty boxes designed for flat items.
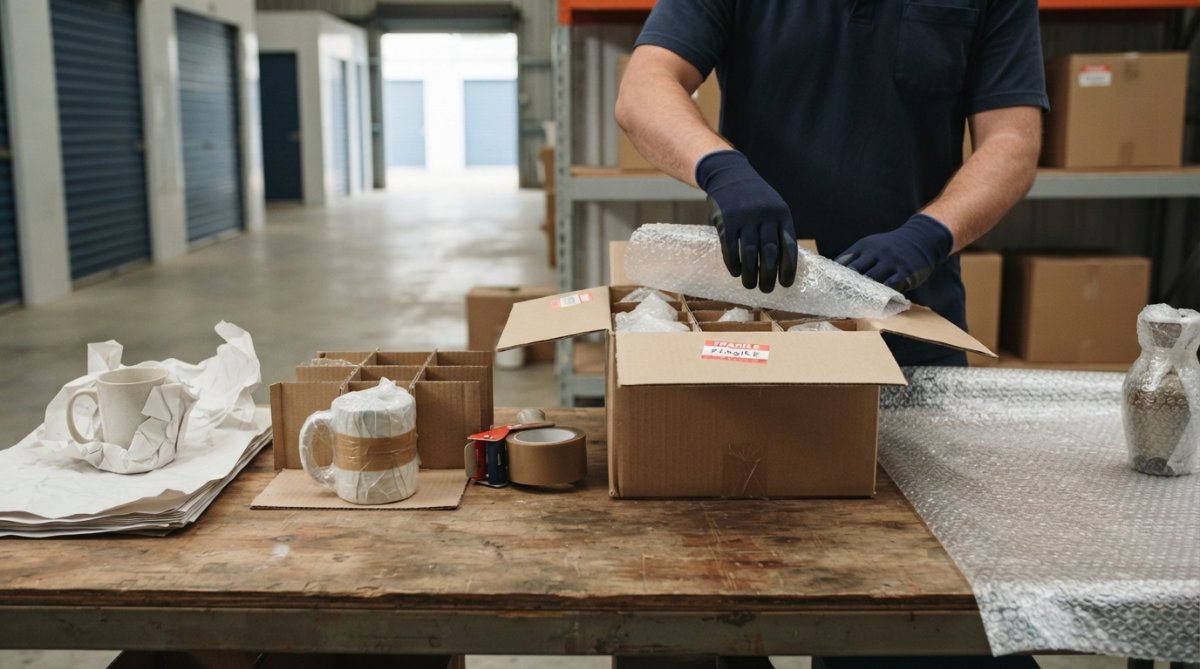
Fill empty spaces with additional padding. A well-packed box should feel solid when shaken, with nothing moving inside. For storage, wrap electronics in acid-free paper before boxing, then add silica gel packets to absorb moisture. Urban Self Storage’s climate-controlled premium units protect electronics far better than standard storage.
Never pack fragile items in large boxes, even if lightweight. Use small to medium boxes exclusively for fragile items.
Step 5: Distribute Weight and Avoid Overstuffing Boxes
Weight distribution determines whether boxes survive stacking. A box weighing more than 50 pounds becomes dangerous to lift and risks damaging items inside. Test each box before sealing: if you cannot comfortably lift it with one hand at waist height, it’s too heavy. Remove items and redistribute them.
Distribute weight evenly within each box. Place heavy items at the bottom, medium-weight items in the middle, and light items on top. This prevents instability when stacked and reduces the risk of crushing lighter, fragile items.
Avoid overstuffing boxes. Leave 1-2 inches of space at the top before sealing. This allows the box to compress slightly under weight without collapsing. Overstuffed boxes are the primary reason boxes fail during stacking.
The weight test is your safest guide: if you can’t comfortably lift the sealed box with one hand, it’s too heavy. Redistribute items rather than risking back injury or box failure.
Step 6: Organise Storage Boxes in Your Unit
How you stack and organise boxes determines how efficiently you can access items later. Create clear pathways through your unit, at minimum, one main aisle running from the entrance to the back. Never stack boxes all the way to the ceiling in front of the entrance; this blocks access.
Stack boxes strategically based on access frequency. Boxes you’ll need regularly go near the entrance. Seasonal items or rarely-accessed boxes go deeper in the unit. Heavy boxes go on lower shelves; lighter boxes go higher.
Use vertical space efficiently. Stack boxes to 6-7 feet high, leaving space for air circulation. If storing furniture, use the space underneath and inside large pieces. A dresser can hold smaller boxes inside; a sofa can have boxes stored underneath.
Create a map of your storage unit layout showing where each category is stored. Combined with your detailed inventory list, this makes retrieval incredibly efficient.
| Stacking Method | Best For | Access Time |
|---|---|---|
| Front entrance access | Frequently needed items | 2-3 minutes |
| Vertical stacking | Seasonal or archived items | 5-10 minutes |
| Under furniture storage | Small boxes and documents | Integrated with retrieval |
| Category-based zones | Mixed-use storage | 3-5 minutes per category |
Common Mistakes to Avoid When Packing Inventory Boxes
The first major mistake is using whatever boxes you have on hand without considering size or quality. Invest in uniform box sizes and quality cardboard.
The second mistake is packing boxes without any organisational system. Commit to numbering boxes, creating an inventory list, and colour-coding categories before packing.
The third mistake is overstuffing boxes to save money. Fewer well-packed boxes beat more overstuffed boxes every time.
The fourth mistake is ignoring weight distribution. Always place heavier boxes on lower shelves and lighter boxes higher up.
The fifth mistake is poor labelling. Detailed labels combined with colour-coding prevent confusion.
The sixth mistake is storing fragile items without adequate protection. Bubble wrap costs little and prevents significant damage.
The seventh mistake is failing to create access paths in your storage unit. Always maintain clear pathways, especially near the entrance.
The eighth mistake is not creating a backup of your inventory list. Keep a printed copy and cloud backup to ensure you always have access to your records.
Packing inventory boxes properly requires planning, the right materials, and a systematic approach. When you invest time in decluttering, creating detailed inventories, and organising your storage unit logically, you gain the ability to store items confidently and retrieve them efficiently. Urban Self Storage provides the secure, climate-controlled environment your packed boxes deserve, with 24/7 CCTV surveillance and flexible access that accommodates your schedule. Our Bunbury locations in East Bunbury and Picton offer multiple unit sizes to match your packing volume, and our quick move-in process means you can start storing within 10 minutes of arriving. Book your unit online now and protect your inventory with storage that matches your organisation standards.
Frequently Asked Questions
What is the best way to label inventory boxes?
Use a colour-coding system combined with detailed written labels on at least two sides of each box. Include the room name, contents summary, and a box number that corresponds to your inventory list. Consider using QR codes linked to digital records for quick scanning. Write clearly with permanent markers and avoid abbreviations that might confuse you later. This approach ensures you can locate items quickly when accessing your storage unit.
How do I create an inventory list for my moving box inventory system?
Start with a spreadsheet or digital inventory management tool listing each box number, contents, room destination, and weight. Include specific item descriptions rather than vague categories. Assign each box a unique identifier and photograph the contents before sealing. Digital tools allow you to search and track items remotely, particularly useful for long-term storage. Keep this list accessible outside your storage unit so you can reference it without visiting in person.
How do I prevent items from breaking when packing fragile items for storage?
Use quality protective padding like bubble wrap, foam sheets, or packing paper around each fragile item individually. Fill empty spaces in boxes with crumpled paper or foam peanuts to prevent shifting during transport and storage. Pack heavier items at the base layers and lighter, more fragile items on top. Clearly mark boxes as 'Fragile' and avoid stacking heavy boxes above them. Consider using smaller boxes for breakables to reduce weight and handling stress.
What materials do I need to pack inventory boxes properly?
Essential packing materials include sturdy moving boxes in various sizes, packing tape, bubble wrap, protective padding, kraft paper, and permanent markers for labelling. For heavier items, use reinforced boxes with strong base layers. Consider eco-friendly alternatives like recycled cardboard, newspaper, or biodegradable packing materials. Stock extra supplies to avoid running short mid-packing. Quality materials protect your household goods and storage inventory during transport and while in your storage unit.
This article was written using GrandRanker