

Table of Contents
- Why Regular Inspection of Storage Cleanliness Matters
- What You’ll Need Before You Start Inspecting
- Step-by-Step Process: How to Inspect Storage Cleanliness
- Storage Unit Cleaning Checklist Australia: Your Inspection Checklist
- Preventing Mould in Storage Units Australia
- Pest Control for Storage Units Australia
- Warehouse Cleanliness Standards Australia and Regulatory Compliance
- Digital Monitoring vs. Manual Inspection: Which Approach Works Best
How to Inspect Storage Cleanliness: Step-by-Step Guide
Last Updated: July 25, 2026
Understanding how to inspect storage cleanliness is essential for protecting your belongings and ensuring your storage facility meets safety and hygiene standards. Whether you’re managing a commercial storage operation, renting a unit for personal use, or overseeing a warehouse facility, knowing what to look for during inspections can mean the difference between well-preserved items and damaged inventory. At Urban Self Storage, we’ve helped thousands of customers across Western Australia maintain clean, secure storage environments. Below, we’ll show you exactly how to inspect storage cleanliness with a practical, step-by-step approach.
Why Regular Inspection of Storage Cleanliness Matters
Cleanliness directly impacts the longevity of your stored items. Many facility managers treat inspections as a box-ticking exercise rather than a critical preventative maintenance task. In reality, regular inspection prevents costly damage before it happens.
Moisture accumulation, pest activity, and structural deterioration often go undetected until significant damage occurs. According to research on facility management practices, preventative inspection protocols reduce damage claims by up to 40% compared to reactive approaches. This means catching problems early through systematic inspection saves both time and money.
The best time to inspect is during cooler months when moisture and pest activity tend to be lower, making it easier to spot early warning signs of problems.
Regular inspection of storage cleanliness ensures compliance with warehouse cleanliness standards Australia sets for commercial operations. For residential storage users, inspections catch problems that could otherwise damage furniture, documents, or sentimental items.
What You’ll Need Before You Start Inspecting
Preparation separates effective inspections from ineffective walk-throughs. Here’s what you’ll need:
- pH testing kit or strips – Essential for water quality assessment
- Moisture meter – Detects humidity levels and early moisture problems
- Flashlight or headlamp – Tank interiors and corners require strong illumination to spot corrosion, sediment, or biofilm
- Clipboard and checklist – Documented findings are non-negotiable for compliance
- Camera or smartphone – Photograph issues for records and to track changes over time
- Gloves and protective equipment – Protects you from contamination and chemical exposure
- Measuring tape – For documenting the extent of any visible damage
- Cleaning supplies – Basic supplies like soft brushes or cloths for minor surface assessment
The most common mistake inspectors make is arriving unprepared and trying to remember details later. Written documentation during the inspection ensures accuracy and creates a compliance record.
Never enter a storage area without proper ventilation assessment first. Poor air circulation can create hazardous conditions, particularly if chemical storage or previous contamination is present.
Step-by-Step Process: How to Inspect Storage Cleanliness
Step 1: Assess External Conditions and Ventilation
Begin your inspection from the outside. External conditions reveal what’s happening inside before you even open the door.
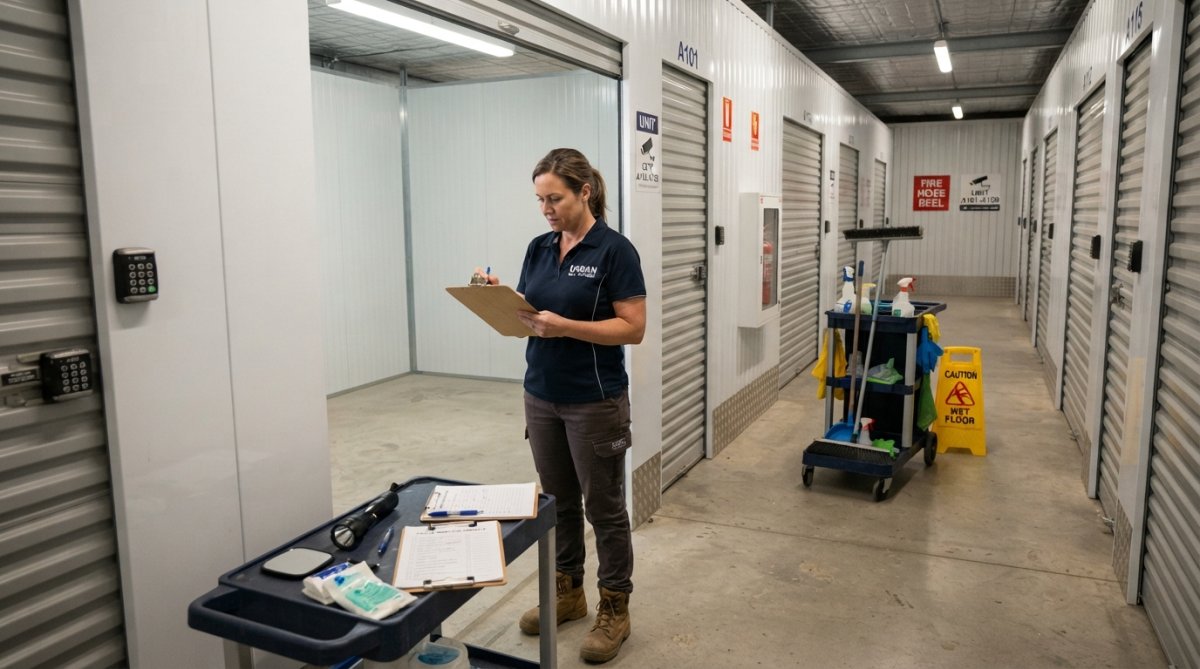
Walk the perimeter of the storage facility and observe:
- Roof and exterior walls – Look for rust, corrosion, or structural damage
- Drainage systems – Check that gutters, downspouts, and drainage channels are clear; blocked drainage leads to water accumulation inside
- Ventilation openings – Ensure vents are unobstructed and properly positioned for air circulation
- Seals and gaskets – Inspect door seals, window seals, and any penetrations for gaps or deterioration
Ventilation is critical because poor air circulation enables mould growth, condensation, and biofilm formation. Open doors slowly and deliberately, noting any odours – musty smells indicate moisture problems, while chemical odours suggest contamination.
Step 2: Check for Water Quality Issues and Drainage Problems
Water-related problems are among the most common causes of storage contamination. Inspect drainage first:
- Floor drains – Are they clear and functional? Pour water to test flow
- Sumps or collection areas – Check for standing water, sediment buildup, or algae growth
- Condensation patterns – Look for water staining on walls or floors
For facilities with water storage tanks or systems, assess water quality by:
- Visual inspection – Look for discolouration, cloudiness, or visible particles
- Odour assessment – Fresh water should have no odour; foul or chemical smells indicate problems
- Surface examination – Check for algae, biofilm, or sediment on tank walls and bottom
Contaminated water can seep into stored items, causing mould, rust, or deterioration. Early detection prevents widespread problems.
Step 3: Inspect Tank Interior and Identify Corrosion or Damage
This step applies to facilities with storage tanks or enclosed storage systems. Corrosion and structural damage compromise the entire system.
Enter the tank or enclosed space carefully and systematically. Use your flashlight to examine:
- Interior walls – Look for rust, pitting, or corrosion patterns; corrosion typically starts at joints and seams
- Floor and base – Sediment buildup collects here; remove samples to assess contamination levels
- Joints and welds – These are failure points; check for cracks, separation, or leaks
- Tank components – Pipes, valves, and fittings should show no signs of deterioration
Document the location and extent of any damage using your measuring tape and camera. Photographs with timestamps create an objective record for compliance and insurance purposes.
Step 4: Test pH Levels and Disinfection Status
pH levels and disinfection status indicate whether the storage environment is safe for stored items and whether sanitation protocols are effective.
Using your pH testing kit:
- Collect a water sample from the storage system or from any pooling water
- Test the pH level – neutral is 7.0; most storage systems should maintain pH between 6.5 and 8.0
- Record the result on your checklist with the date and time
Abnormal pH levels indicate:
- Low pH (acidic) – Suggests corrosion activity or contamination
- High pH (alkaline) – May indicate chemical contamination or improper treatment
For disinfection assessment, check whether sanitization records exist and whether disinfection has been applied according to schedule.
Regular pH testing and disinfection documentation are the two most overlooked inspection tasks, yet they’re critical for preventing biofilm growth and maintaining regulatory compliance.
Step 5: Document Findings and Create Records
Documentation transforms an inspection into a formal compliance record. Your documentation should include:
- Date and time of inspection
- Inspector name and credentials
- Facility or unit identification
- Visual observations – condition of walls, floors, ventilation, drainage
- Measurements – moisture levels, pH readings, dimensions of any damage
- Photographs – timestamped images of problem areas
- Corrective actions needed – list specific issues requiring attention
- Follow-up date – when the next inspection should occur
Store records digitally and in hard copy. If you discover significant issues, create a separate action plan with responsible parties and deadlines for correction.
Storage Unit Cleaning Checklist Australia: Your Inspection Checklist
A comprehensive storage unit cleaning checklist Australia should cover all critical areas. Use this checklist during every inspection to ensure nothing is missed.
| Inspection Area | What to Check | Pass / Fail | Notes |
|---|---|---|---|
| Ventilation | Vents clear, air circulation adequate | [ ] | Record any blockages |
| Drainage | Drains functional, no standing water | [ ] | Test with water if possible |
| Walls and Ceiling | No visible mould, corrosion, or damage | [ ] | Photograph any damage |
| Floor | Clean, dry, no sediment buildup | [ ] | Check for staining patterns |
| Water Quality | pH level 6.5-8.0, no discolouration | [ ] | Record pH reading |
| Pest Signs | No evidence of rodents, insects, or birds | [ ] | Look for droppings, nests |
| Humidity Levels | Below 60% relative humidity | [ ] | Use moisture meter |
| Seals and Gaskets | No gaps, tears, or deterioration | [ ] | Check door seals especially |
| Safety Hazards | No slip hazards, sharp edges, or obstructions | [ ] | Clear any obstacles |
| Odours | No musty, chemical, or foul smells | [ ] | Note any unusual odours |
Complete this checklist on-site during your inspection. Don’t rely on memory – write findings immediately while you’re observing them.
Preventing Mould in Storage Units Australia
Mould prevention is the most cost-effective maintenance strategy. Once mould establishes itself, remediation becomes expensive and time-consuming. Mould requires three conditions: moisture, darkness, and organic material. Storage units naturally provide darkness and often contain organic materials. Moisture is the variable you can control.
To prevent mould in storage units Australia:
- Maintain ventilation – Ensure air circulation prevents stagnant, humid conditions
- Monitor humidity – Keep relative humidity below 60% using moisture meters
- Inspect drainage regularly – Blocked drains trap moisture and create ideal mould conditions
- Address condensation – Improve insulation and ventilation to prevent condensation
- Clean surfaces – Remove dust and organic debris that mould feeds on
- Use desiccants – Silica gel or other desiccants absorb moisture in sealed spaces
- Document conditions – Track humidity and temperature over time to identify problem periods
Early detection during inspection prevents mould from spreading. If you spot early-stage mould, address it immediately before it becomes systemic.
Winter months in Western Australia often bring higher humidity; increase inspection frequency during these periods to catch moisture problems before they develop into mould.
Pest Control for Storage Units Australia
Pest infestation destroys stored items and contaminates the entire facility. During your inspection, look for:
- Droppings – Rodent droppings are small and dark; insect droppings vary by species
- Nests or nesting material – Birds and rodents leave visible nests in corners and high areas
- Damage to stored items – Chew marks, holes, or contamination indicate active infestation
- Pest entry points – Gaps in seals, holes in walls, or openings around pipes
- Odours – Ammonia-like smells suggest rodent urine; musty smells may indicate insect nests
Pest control for storage units Australia involves:
- Sealing entry points – Close gaps around doors, pipes, and vents with caulk or weatherstripping
- Removing attractants – Ensure no food sources or organic debris remain
- Professional treatment – Schedule pest control services if infestation is detected
- Ongoing monitoring – Regular inspection catches new infestations early
Prevention is more effective than treatment. A sealed, clean facility with good ventilation is naturally resistant to pest problems.
Warehouse Cleanliness Standards Australia and Regulatory Compliance
Warehouse cleanliness standards Australia are set by various regulatory bodies depending on what’s being stored. For food storage, the Australia New Zealand Food Standards Code requires documented sanitation and pest control measures. For general commercial storage, workplace health and safety legislation requires facilities to maintain safe, clean conditions.
Key compliance requirements include:
- Documentation – Written records of all inspections, maintenance, and corrective actions
- Frequency – Regular inspection schedules (typically monthly to quarterly depending on facility type)
- Sanitation protocols – Documented cleaning and disinfection procedures
- Pest management – Evidence of pest control measures and monitoring
- Safety standards – Compliance with slip-and-fall prevention, chemical safety, and other hazard controls
If you’re unsure about your specific regulatory requirements, consult with your local council or a compliance specialist.
Digital Monitoring vs. Manual Inspection: Which Approach Works Best
Modern facilities increasingly use digital monitoring systems alongside manual inspection. Understanding when to use each approach optimizes your inspection process.
Manual inspection strengths:
- Detects problems that sensors miss (visual corrosion, pest signs, odours)
- Allows subjective assessment of overall facility condition
- Creates direct accountability for the inspector
Digital monitoring strengths:
- Provides continuous 24/7 data on humidity, temperature, and pH
- Generates automatic alerts when conditions exceed thresholds
- Creates objective, timestamped records for compliance
The best approach combines both. Use digital sensors for continuous monitoring of critical parameters, then conduct monthly manual inspections to assess visual conditions, pest activity, and structural integrity. For most facilities, a hybrid approach is cost-effective: install sensors in critical areas, review data weekly, and conduct thorough manual inspections quarterly.
Digital monitoring is an efficiency tool, not a replacement for manual inspection. The most effective facilities use sensors to guide when manual inspections are most needed.
Storage cleanliness isn’t a one-time task – it’s an ongoing commitment to protecting your belongings and maintaining facility integrity. Urban Self Storage maintains clean, secure facilities across Western Australia with advanced 24/7 CCTV surveillance and modern, well-maintained storage units designed to protect your household items, furniture, and business inventory. Our team conducts regular inspections using the protocols outlined in this guide, ensuring your stored items remain in excellent condition. Book online now to secure your storage unit and gain peace of mind knowing your belongings are in a professionally maintained facility.
Frequently Asked Questions
What are the main signs that a storage unit needs cleaning or inspection?
Look for visible sediment buildup, discolouration on walls or floors, musty odours indicating biofilm growth, water stains suggesting drainage issues, pest droppings, and corrosion on metal components. Signs of contamination include cloudy appearance, unusual taste or smell in stored water, and visible algae. Regular visual checks help catch these issues early before they compromise system integrity or create safety hazards.
How often should you inspect storage cleanliness in Australian facilities?
Most Australian facilities should conduct visual inspections monthly, with more thorough hygiene inspections quarterly. High-use storage areas may require weekly checks. Document all findings in a maintenance schedule. Professional non-destructive testing (NDT) should occur annually to assess structural integrity. Frequency depends on environmental factors, usage patterns, and regulatory requirements specific to your facility type.
What cleaning supplies and safety equipment do I need for storage inspection?
Essential items include personal protective equipment (PPE) such as gloves, safety glasses, and respiratory protection; cleaning materials like brushes and appropriate disinfectants; pH testing kits; moisture metres; torches for interior visibility; and documentation tools. For larger inspections, consider non-destructive testing equipment. Always ensure proper ventilation protocols are in place before entering confined spaces, and follow work area safety guidelines to prevent slip hazards.
How can I prevent mould and pests in my storage unit?
Maintain proper ventilation to reduce humidity and prevent biofilm formation. Use appropriate disinfection methods during cleaning to eliminate contamination sources. Ensure adequate drainage to prevent water pooling. Seal gaps and cracks where pests might enter. Store items off floors when possible. Conduct regular inspections to catch early signs of infestation. Keep detailed records of cleaning and maintenance activities. Consider professional pest control services if problems persist despite preventative measures.
This article was written using GrandRanker